
Cloudflare is a Content Delivery Network (CDN) made up of a globally distributed network of proxy servers. In fact, Cloudflare is among the biggest and most well-known CDNs in the world. Here we will talk about all you need to know on how to set-up Cloudflare for WordPress Website, why you would want to do this.
Cloudflare Features and Benefits for WordPress Websites
Your Website is Always Online
The majority of hosting companies guarantee 99.99% uptime. You can be confident that Cloudflare will come to your rescue if and when that 0.01% happens.
Faster Loading Time
Cloudflare will deliver responses to your users/visitors via an optimum pathway to achieve maximum speed by utilizing the large network of internationally distributed servers.
Built-In Firewall
Your website will be safeguarded by a built-in firewall while deploying Cloudflare with WordPress. It is intended to not only stop traffic from IP addresses that have been blacklisted, but also to prevent access by malicious web apps.
DDoS Protection
Attacks known as Distributed Denial of Service (DDoS) are used to interfere with a server’s or network’s regular inbound traffic. By bombarding the target with redundant incoming traffic, it overwhelms it and makes it unresponsive.
Now, Cloudflare can protect your website from any DDoS attacks.
How to Set Up Cloudflare for WordPress
First this first, you need to connect you site to Cloudflare prior to any other configurations.
To do that, the majority of the basic setup is to change your domain’s nameservers to Cloudflare.
Create a Free Cloudflare Account
To get started, go to Cloudflare and create a free account.
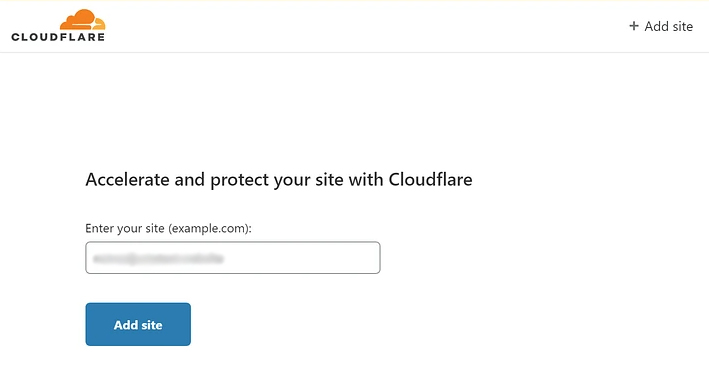
After your account is created, click on Add site and enter your domain name. Enter the domain name of the WordPress site that you want to use with Cloudflare and click Add site.
You’ll then be asked to select a plan. For majority of WordPress sites and blogs, you can choose the free plan for the time being.
Once you choose your plan, Cloudflare will scan your site’s DNS records. You don’t necessarily need to know all these. You can click on continue at the bottom of the page.
Cloudflare will give you a new set of nameservers to replace your existing nameservers.

Nameservers are part of the connection between your domain name and your web hosting. You can have Cloudflare send traffic to your website when you switch to use their nameservers.
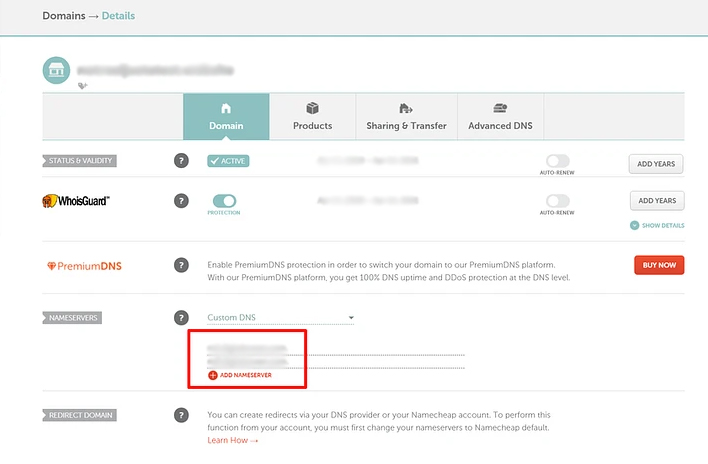
How you change your nameservers depends on where you registered your domain name. This tutorial is based on Namecheap. It should be quite the same for other domain registrars.
Here, you need to change the nameservers option to Custom DNS, and then add the two nameservers Cloudflare provided in the earlier step.
Once you’ve changed your domain’s nameservers, go back to the Cloudflare interface and click the Done, check nameservers button.
Note that nameservers can take up to 24 hours to update, so you might need to wait a bit for Cloudflare to update. Generally speaking, this never took more than an hour for me, but be patient here. Additionally, nothing bad is happening to your WordPress website, so don’t panic.
Basic Settings for WordPress on Cloudflare
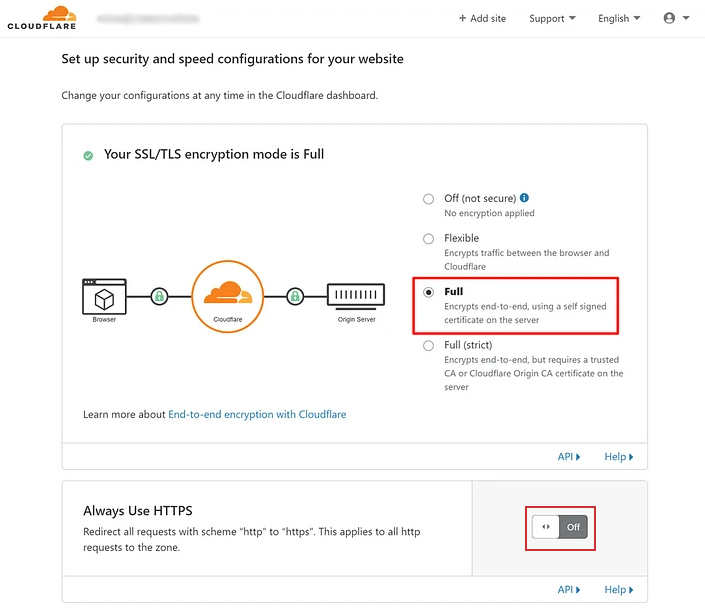
You must choose the Full option if you want to use SSL/HTTPS. This helps in securing traffic to your website and helps in getting the green padlock on users’ browsers.
Also, turn on Always Use HTTPS if you use the Full option for SSL/TLS.
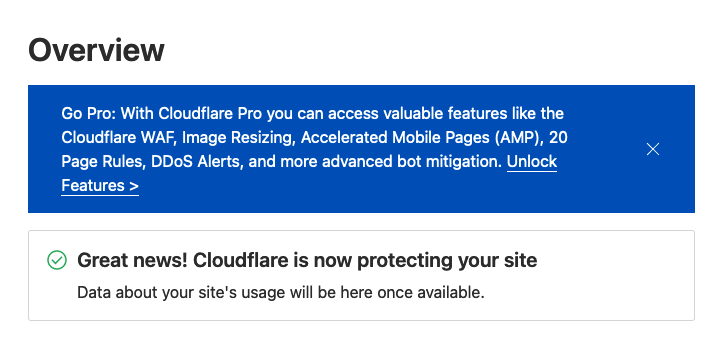
Lastly, in the Overview section, click on Re-check now to see if nameservers have updated.
Once they do, you should see a success message.
That’s all! You just configured WordPress to use Cloudflare.
How to Speed Up WordPress Website?
There are multiple plugins in the WordPress plugin repository, but to my knowledge, the best and most effective one to speed up WordPress website in minutes is Super Page Cache for Cloudflare.
Follow this ARTICLE for a step-by-step guide on how to speed up your WordPress website.