Delivering a WordPress website to a client involves a number of steps. In this article, I explain the steps which I take every time I deliver a new WordPress website to a new client. Do you want to look professional to your clients, and you don’t know how to deliver a WordPress Website to a client. Why is it important? Follow the rest of the article to learn all about it.
- Finalize the website to make sure that the website is fully developed, tested, and functional. This includes ensuring that all the necessary plugins and themes are installed and activated, and that the content is properly formatted and organized.
- Provide the client with the login details for the WordPress dashboard.
- Provide documentation for your client that outlines how to use the website and make changes to the content.
- These are three improvements you might wish to make before delivering the finished product to look more professional.
- Just before I hand over the website to each of my clients, I personally make these adjustments.
Here are the adjustments:
- Custom Login Page Design
- Dashboard Interface Customization
- Custom Admin Page URL
When an admin attempts to log in to a WordPress admin page, this is the first screen they view. Modifying the login page gives you, as a developer, a competitive advantage over rivals who are creating websites without doing the same.
The login page can be customized in two different ways: either by adding custom code or by using a plugin.
In this tutorial, we install a plugin called White Label CMS, which we will benefit from for other tweaks to the main dashboard page.
- In the left-hand side, go to Plugins > Add New.
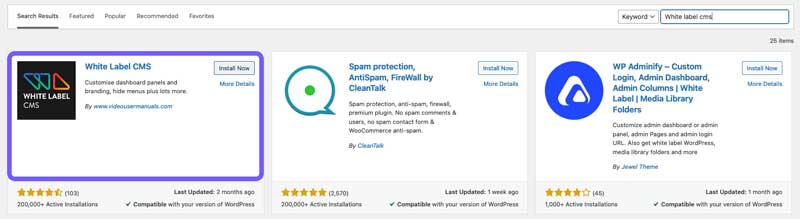
- In the search bar, type “White Label CMS” and hit enter.
- Once you find it in the WordPress Plugin Repository, click on Install the Activate the plugin.
- In the left-hand side, go to Settings > White Label CMS.
White Label CMS has its own dashboard which you can navigate through and make you changes.
Let’s start by configuring your WordPress installation with White Label CMS plugin.
Go to Branding tab on top of White Label CMS dashboard.
WordPress Branding
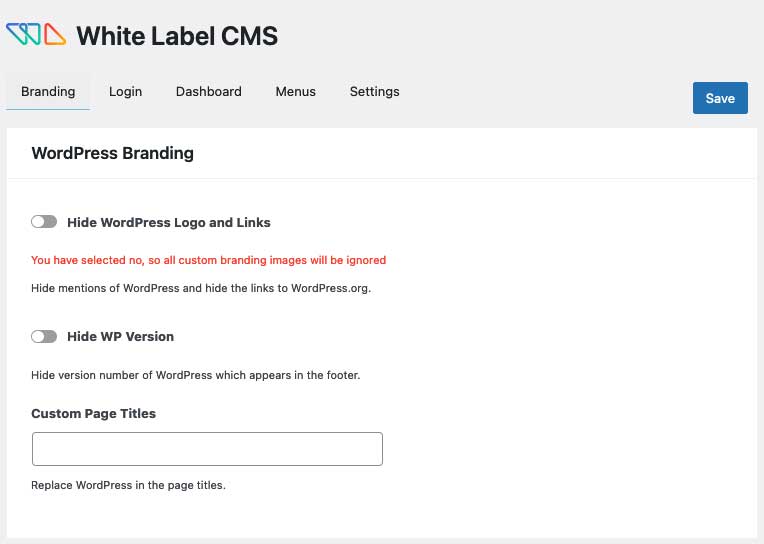
- Turn on Hide WordPress Logo and Links.
- You can Hide WordPress Version. Or leave it to show WordPress Version.
Admin Bar Branding
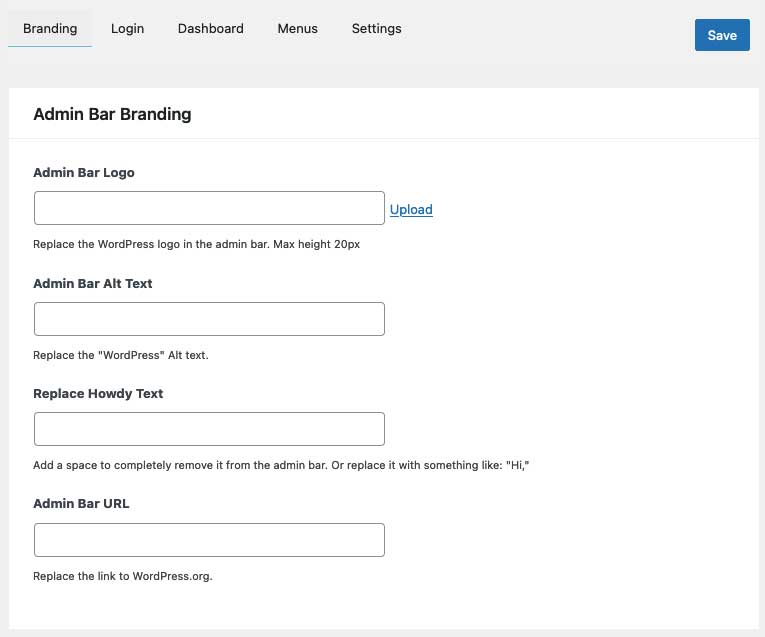
- Upload a logo to replace WordPress Logo.
- Replace the WordPress text with an alternative Text, such as, your company name.
- Replace with Howdy text with another text, such as, Hello.
- Replace WordPress.org URL to your company’s website URL.
Side Menu Branding
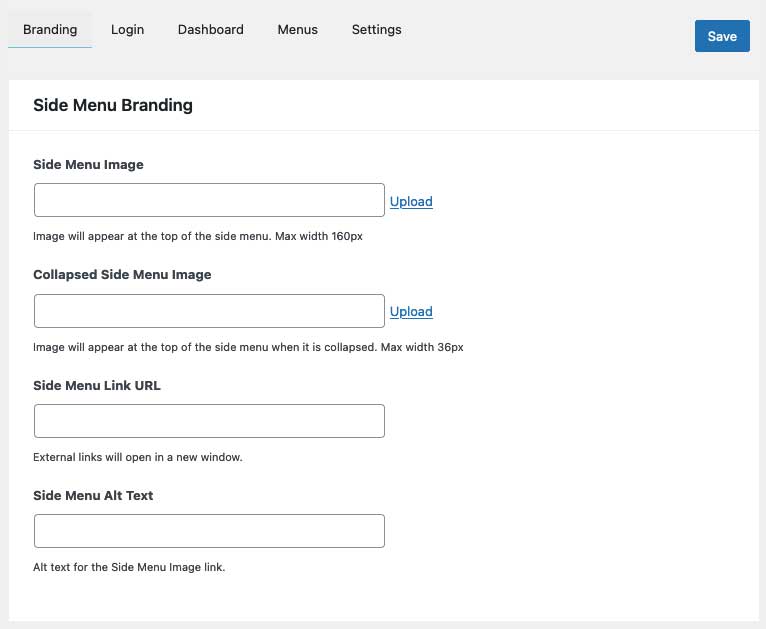
- Upload a logo to change side menu image.
- Upload a logo to change collapsed side menu image.
- You can also change the side menu link to your company’s website URL.
Footer Branding
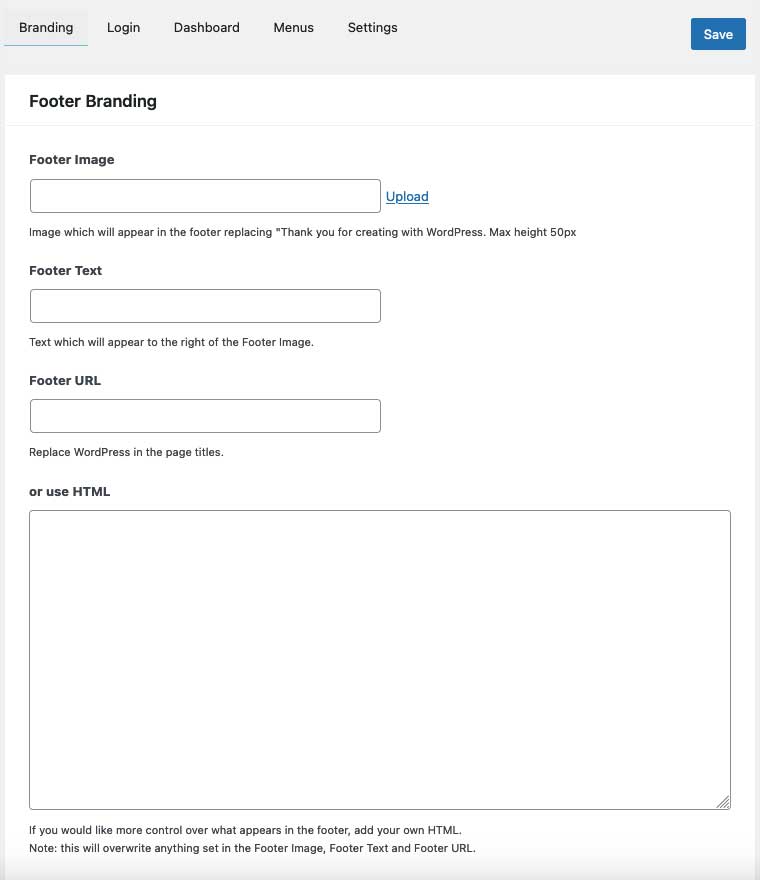
- Upload a logo to change the footer image.
- Replace footer text. I.e., Designed and Developed by “Your company name”.
- Replace footer URL to you company’s website URL.
Finally, don’t forget to hit Save to store your changes.
Now, go to Login tab on top of White Label CMS dashboard.
Logo and Background
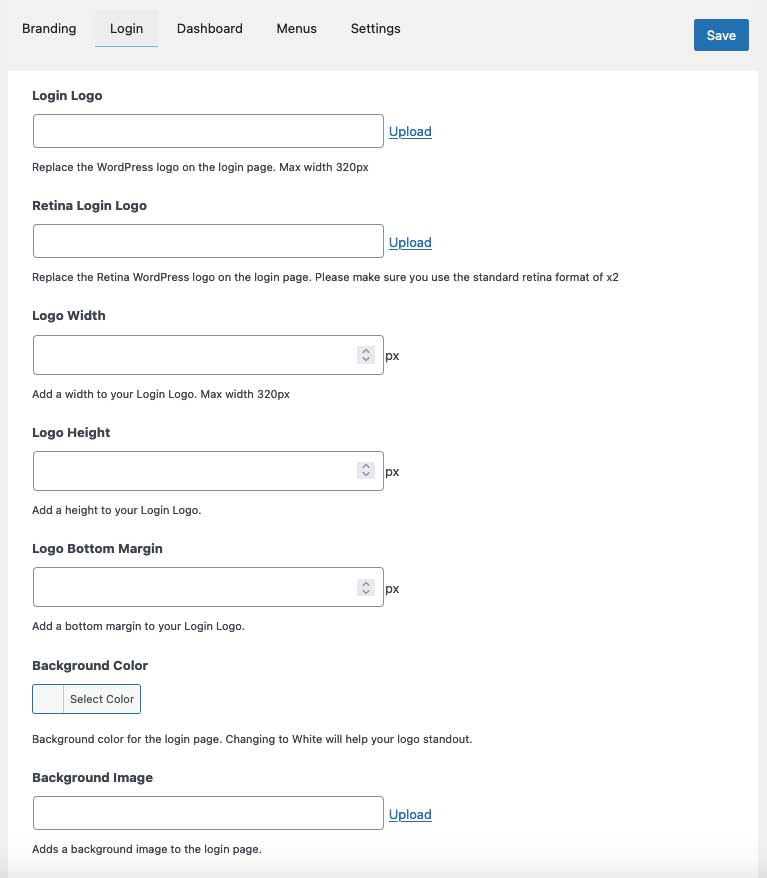
- Upload a logo to change the Login Logo.
- Set Logo width and height.
- Set background color or upload a background.
Advanced
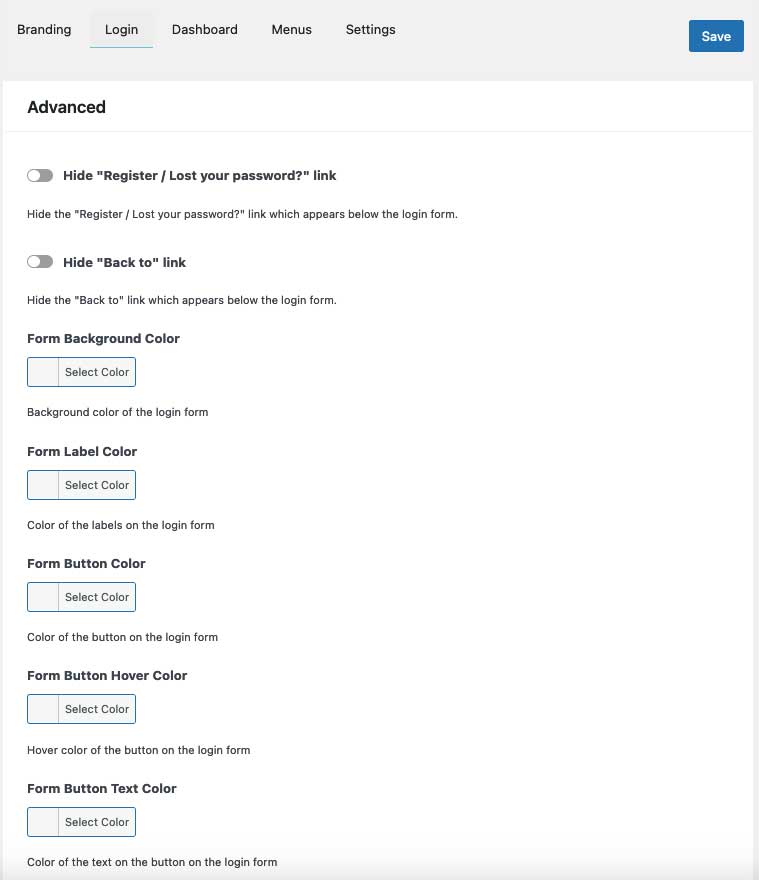
- Personally, I prefer to hide “Register / Lost your password?” link if you don’t have registration section on the website.
- You can form background color, and many more in this section.
- Finally, hit save.
It is time for the most important changes on the admin page before delivering the WordPress website to a client.
Go to Menus tab on top of White Label CMS dashboard.
Here, you should turn on “Want to hide menus for your client?” to be able to change how the WordPress admin page deals with other admins except you who is the main admin.
Menus
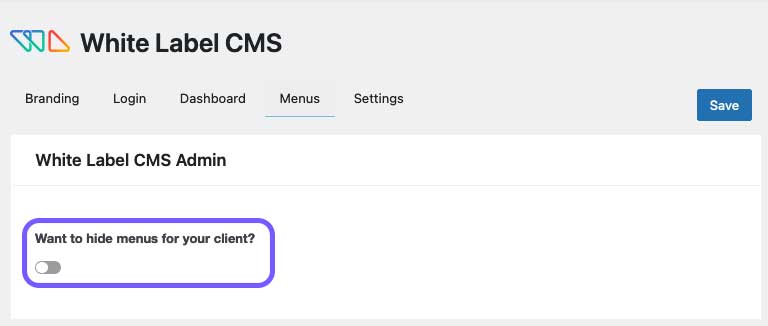
In this section, you can turn off any menu items to hide them from your client. Usually, I turn off those items which are not necessary for the clients to access. After you decided what items are not important, you can simply turn them off and save your changes.
Great job! You have now customized your admin page and dashboard, and the WordPress website is almost ready to be delivered to your client.
Just before we do that, there is another tip to customize the login page which is changing the admin page URL from example.com/wp-admin to something which is more professional. This change is also a security modification since everyone knows that admin URL in WordPress is /wp-admin.
To make this modification, check this ARTICLE to learn the trick (It’s really simple believe me).